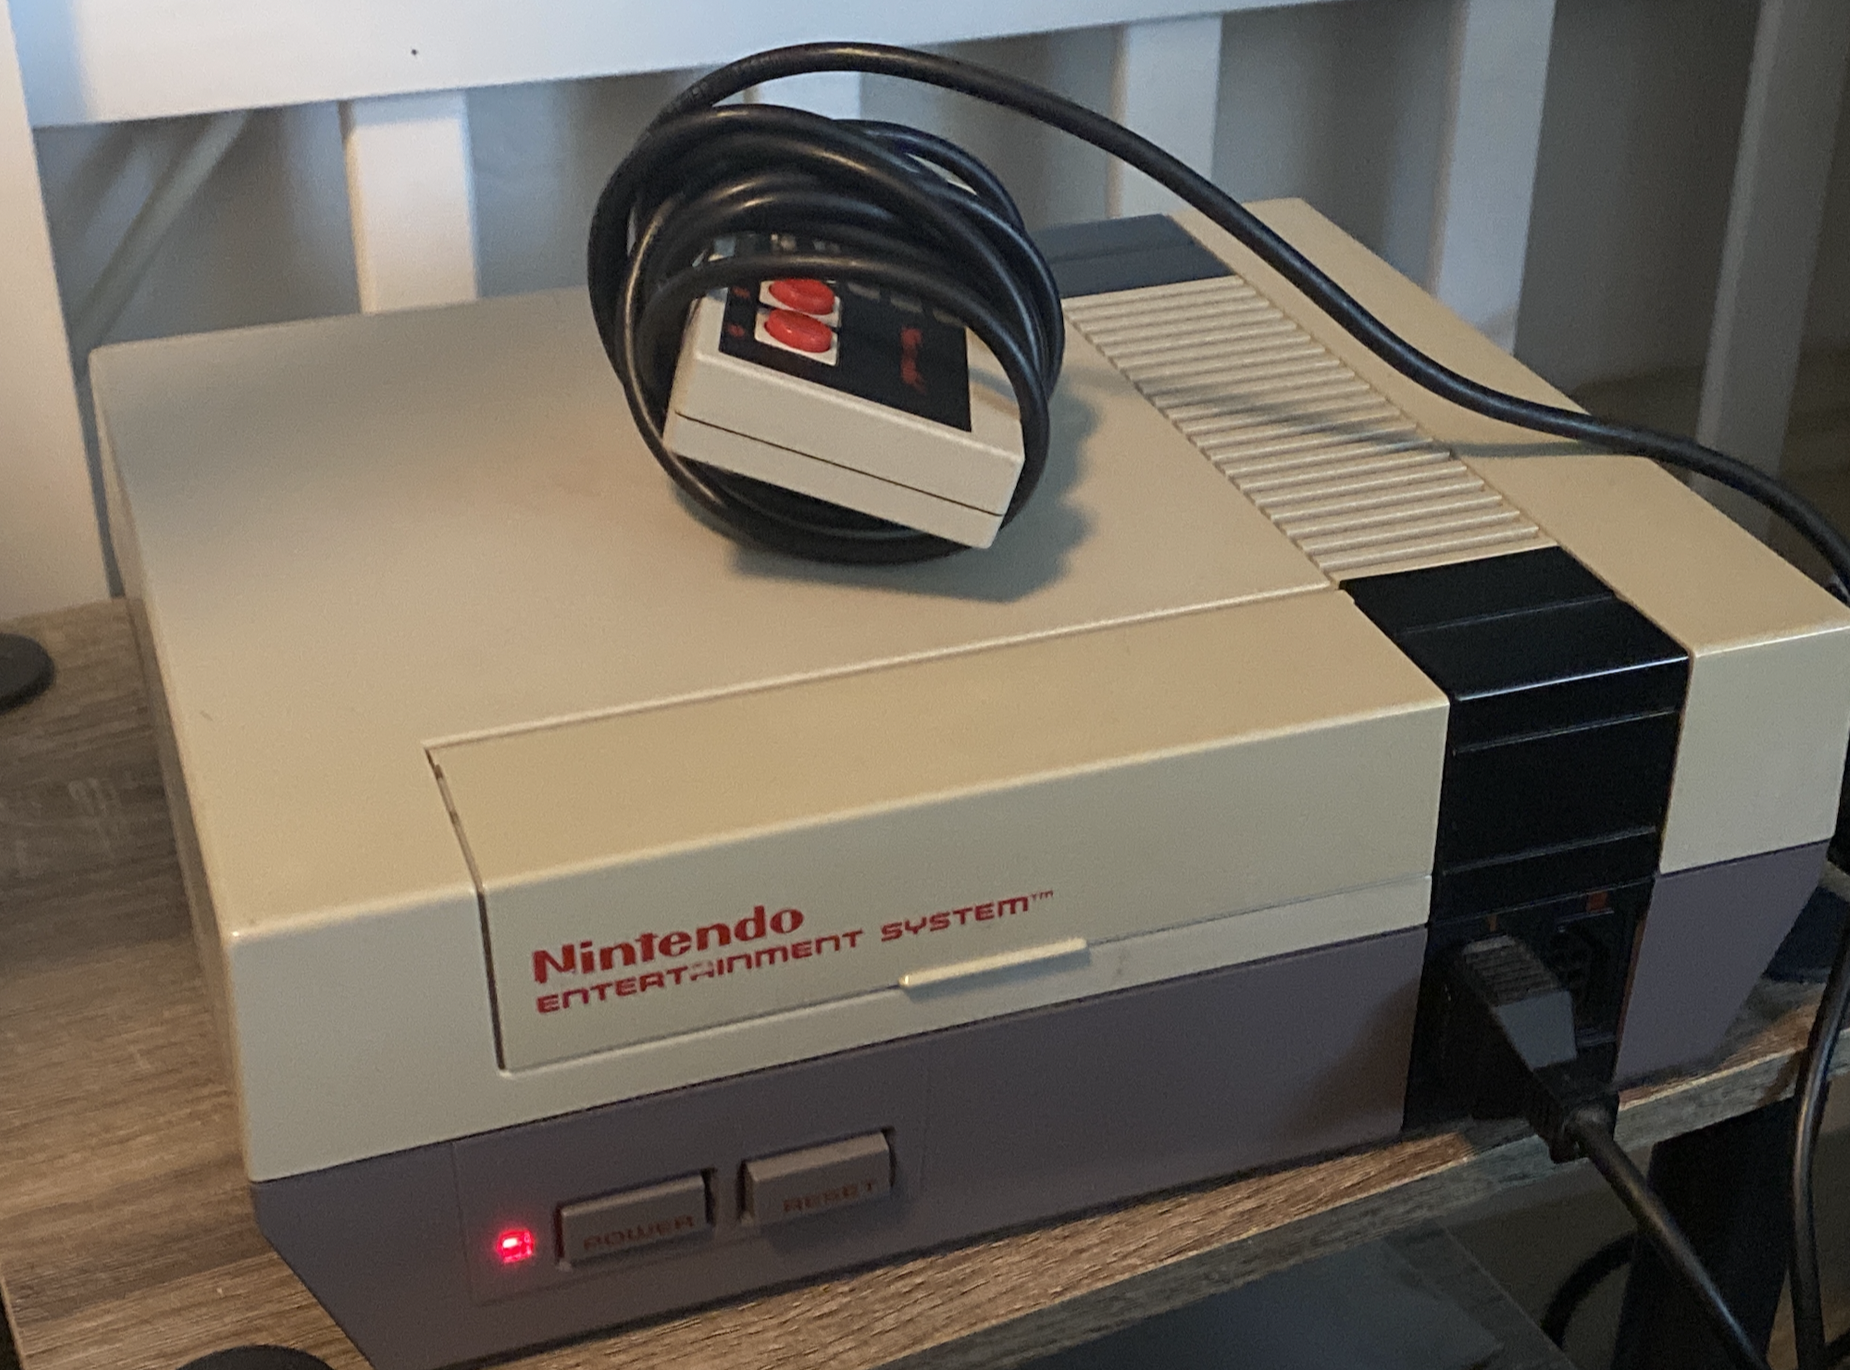
A few years ago, I received a Nintendo Entertainment System (NES) from an old friend. It was in decent condition—apart from having "Defective" written on the top of it.
I didn’t think I’d actually be able to fix it, but I wanted to give it a try anyway.
If nothing else, it would make a good shelf piece.
So I took on the challenge.
Right away I ran into the first hurdle: there were no power or video cables.
The original cables for the NES were missing. I looked around locally for a compatible AC adapter but couldn’t find one, so I ended up ordering one from Amazon.
The video cable was an easier problem to solve. The NES uses composite video, so I grabbed a standard RCA cable. I plugged red into red and white into yellow (which sounds ridiculous), but since it’s analog it actually worked fine.
Not pretty, but it did the job.
Once everything was hooked up, it was time to see what was actually wrong with the console.
When I powered it on, I was greeted with the classic blinking red light and no video output.
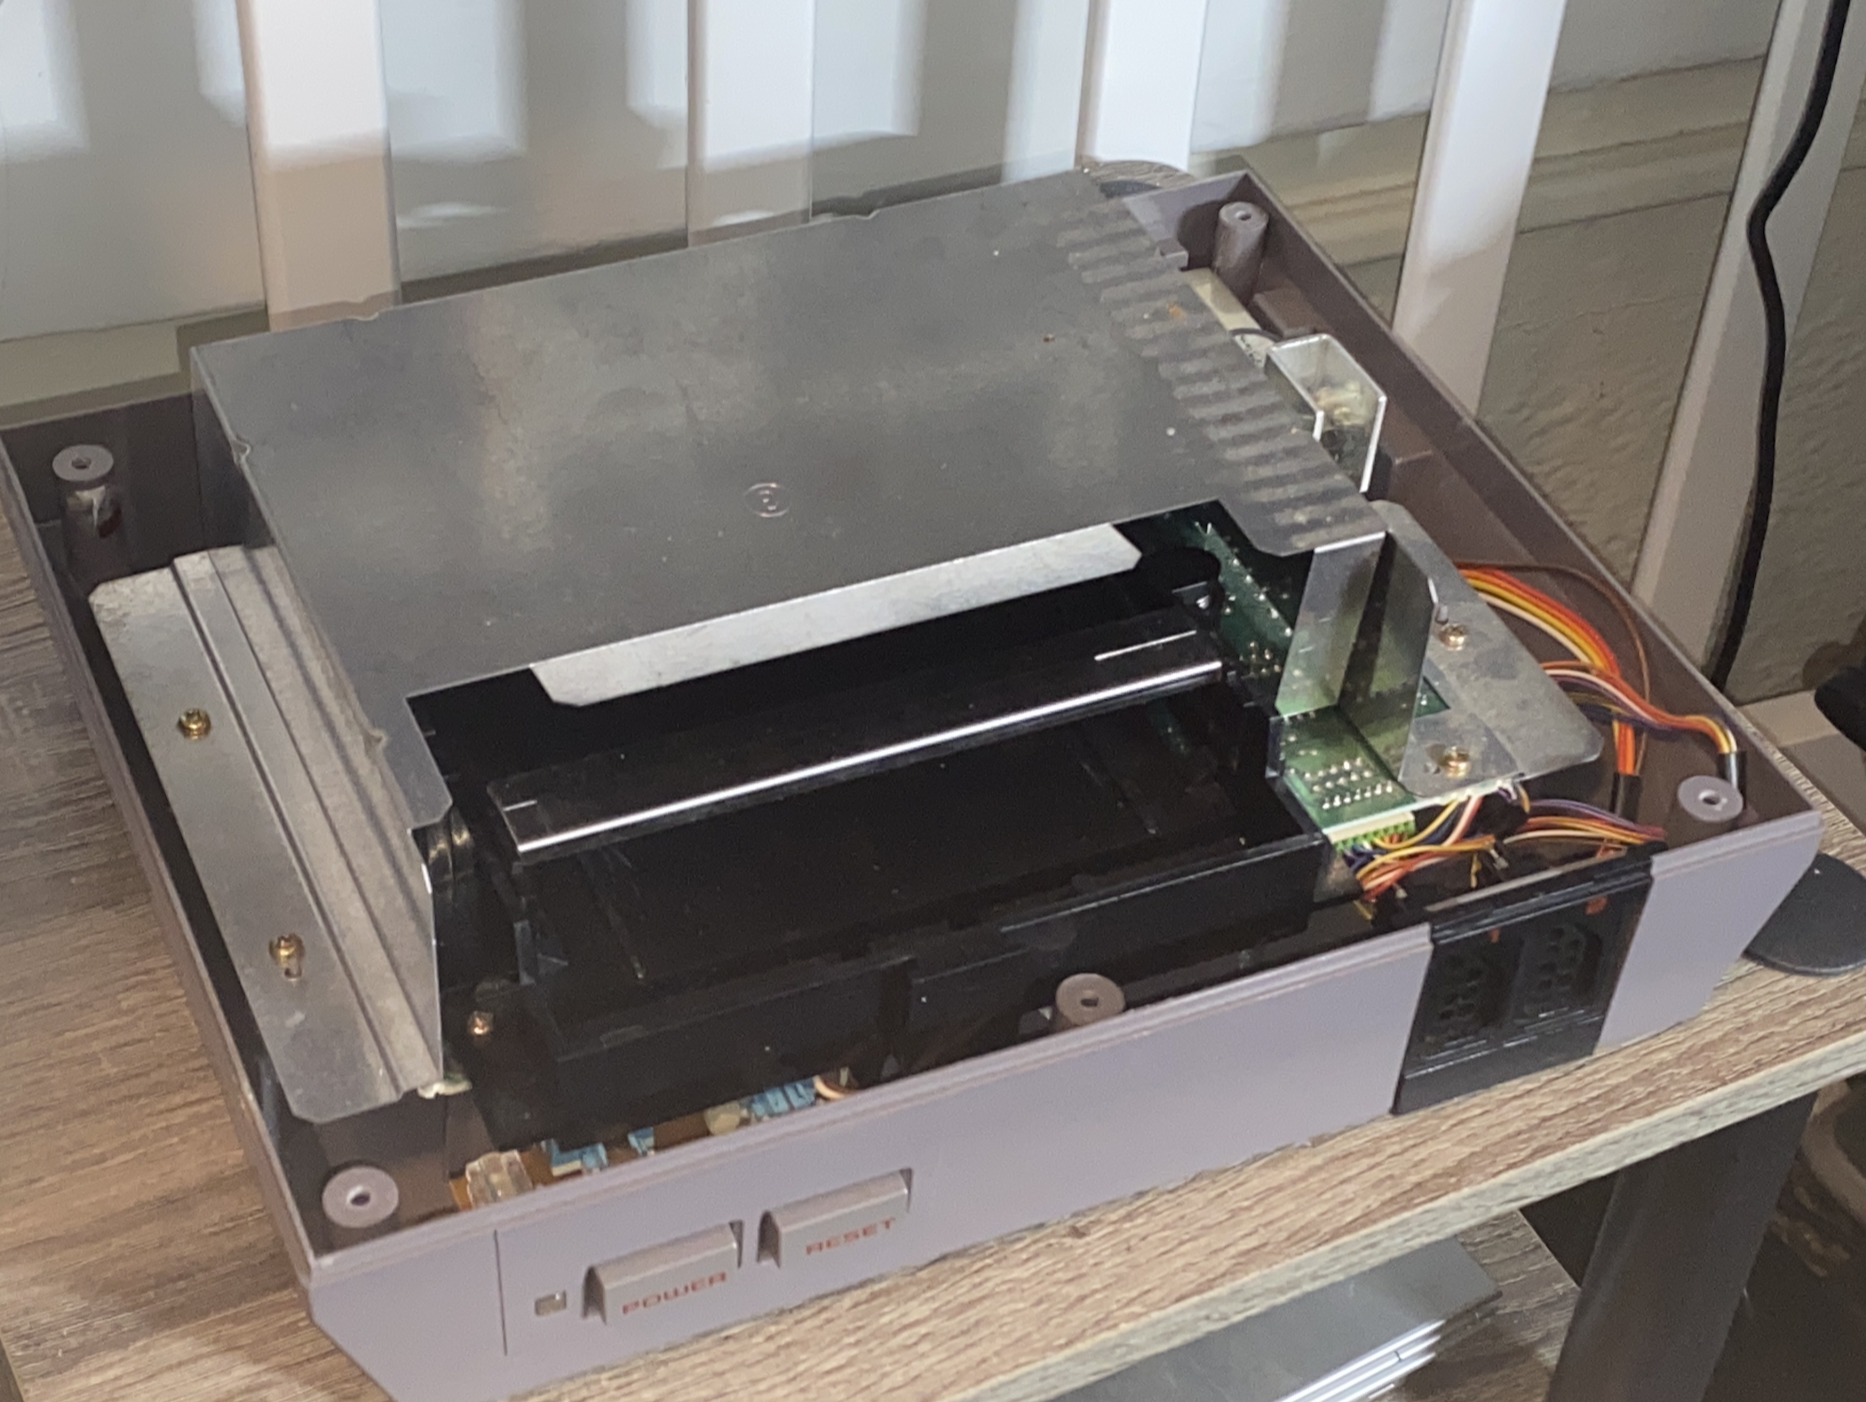
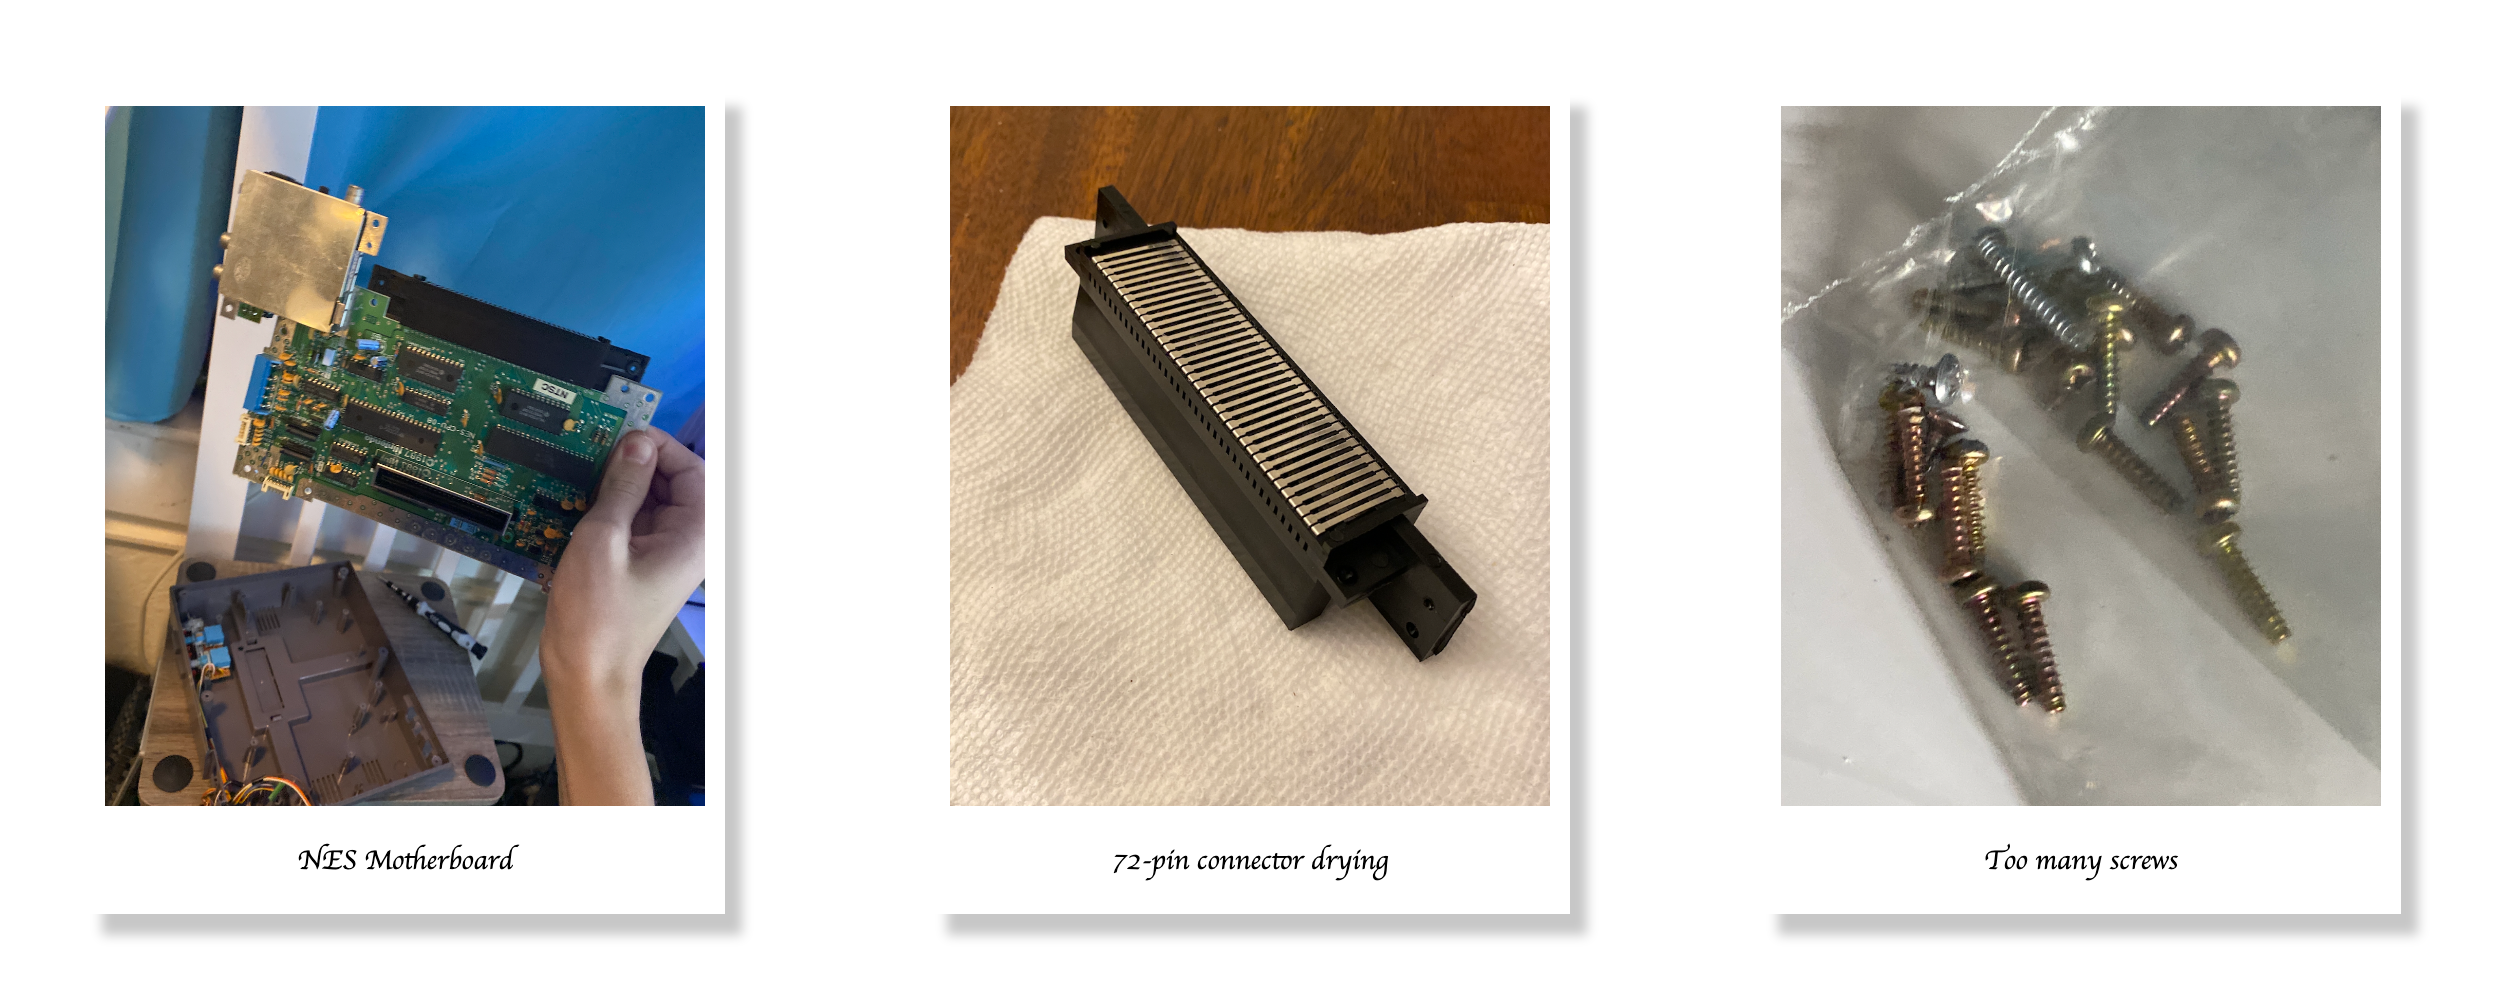
So I opened the console to investigate.
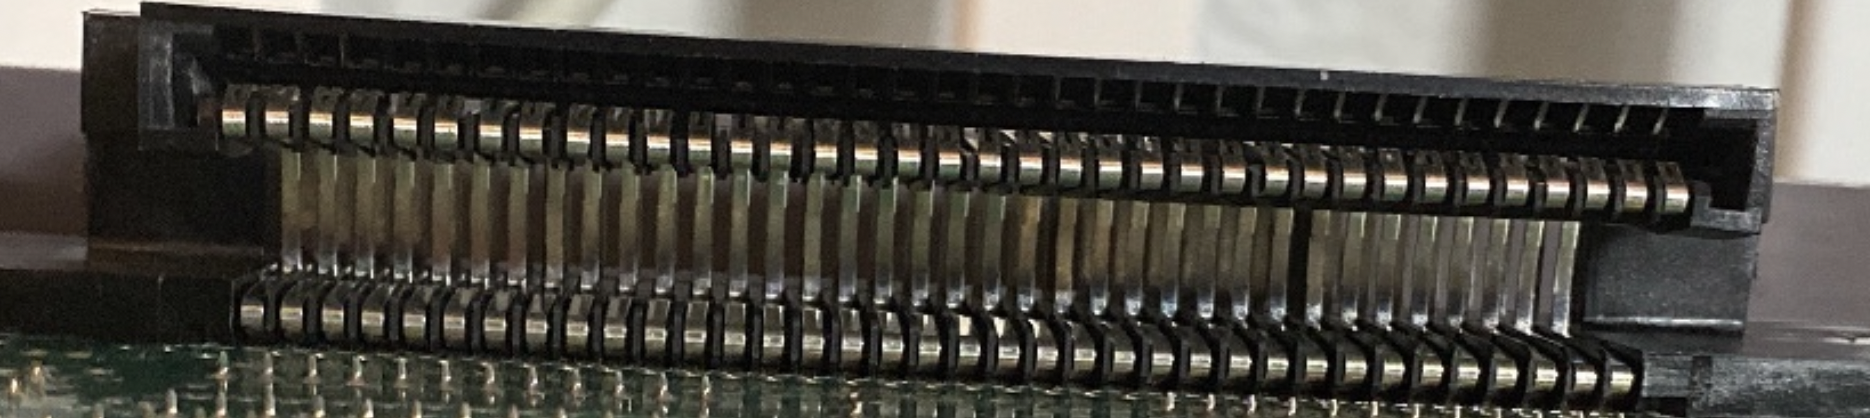
A quick search online suggested the 72-pin connector was the likely culprit. Over time, these connectors wear out and the copper contacts oxidize.
Many people recommended not buying replacement connectors, since aftermarket ones are often worse than the originals. So I grabbed a toothbrush and some 70% isopropyl alcohol and cleaned the pins as best as I could.
I reassembled the console, powered it on, and…
Nothing changed.
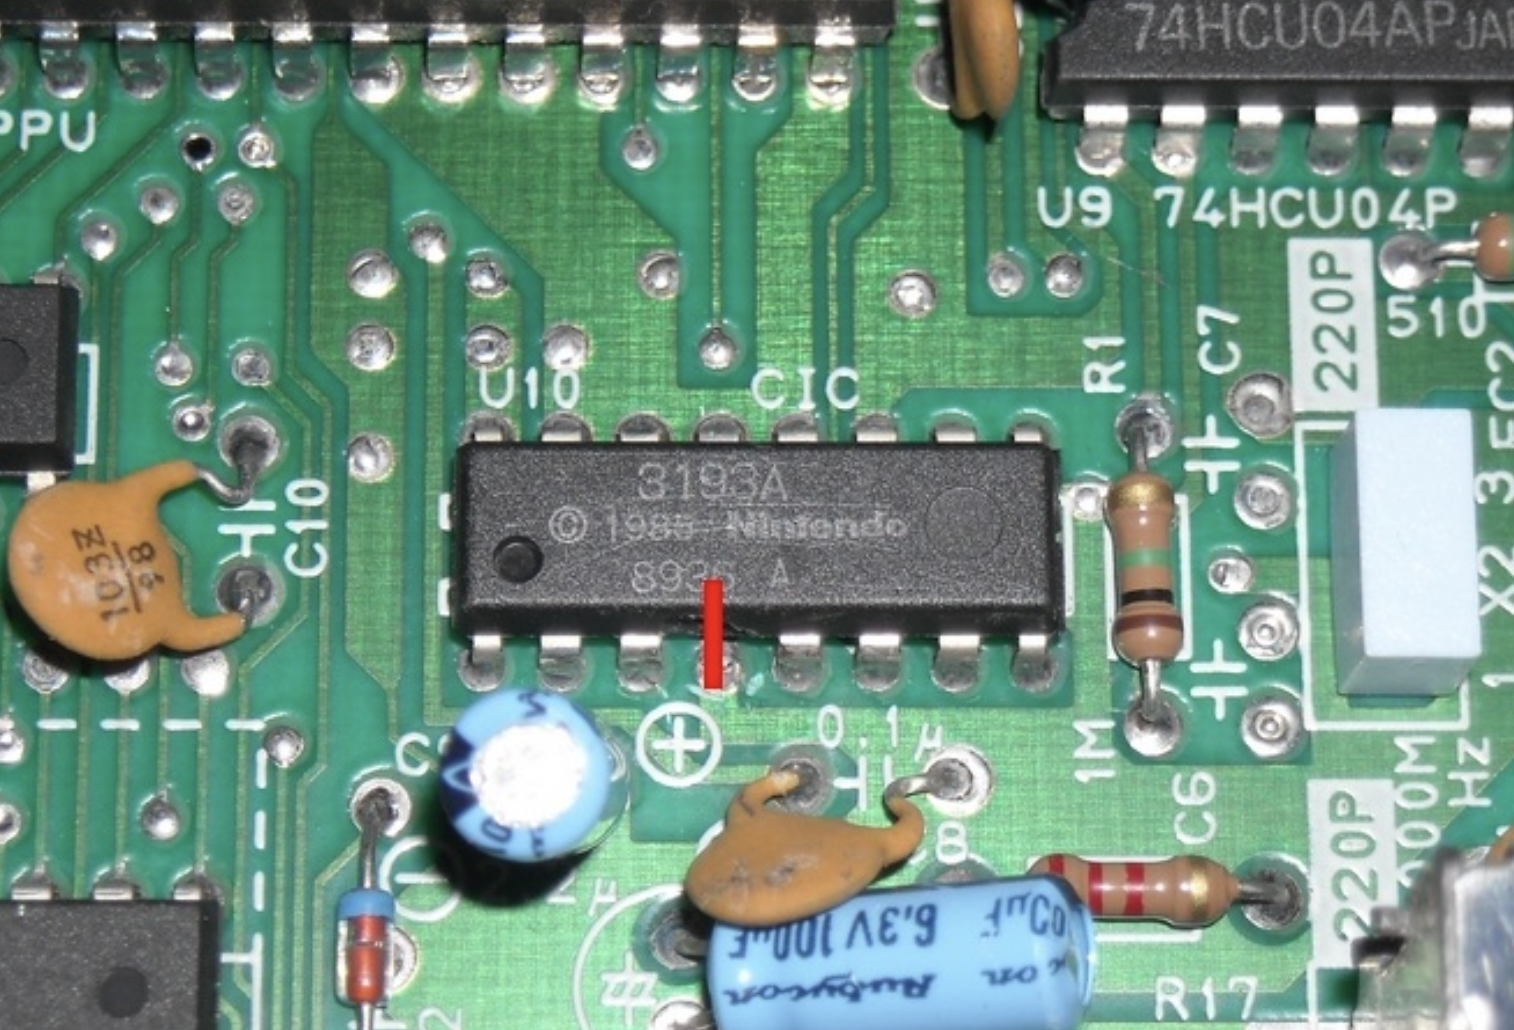
After some more research, I found another possible cause: the CIC lockout chip.
Disabling it can sometimes fix the blinking red light issue. As a bonus, it also makes the console region-free.
But before touching anything, I needed to be absolutely sure which chip and which pin I was dealing with. I triple-checked everything against reference photos. (see Fig.3)
Once I was confident, I took a screwdriver and ripped the pin out.
It felt incredibly wrong—like I had just broken something.
But I trusted the research.
When I powered the console on again, something was different.
The blinking light was gone. Instead, I got a blue screen, and the power light stayed solid.

Progress… but still not working.
At this point I was running out of options.
I went back to researching the 72-pin connector and started seriously considering buying a replacement.
Then I came across a very strange suggestion:
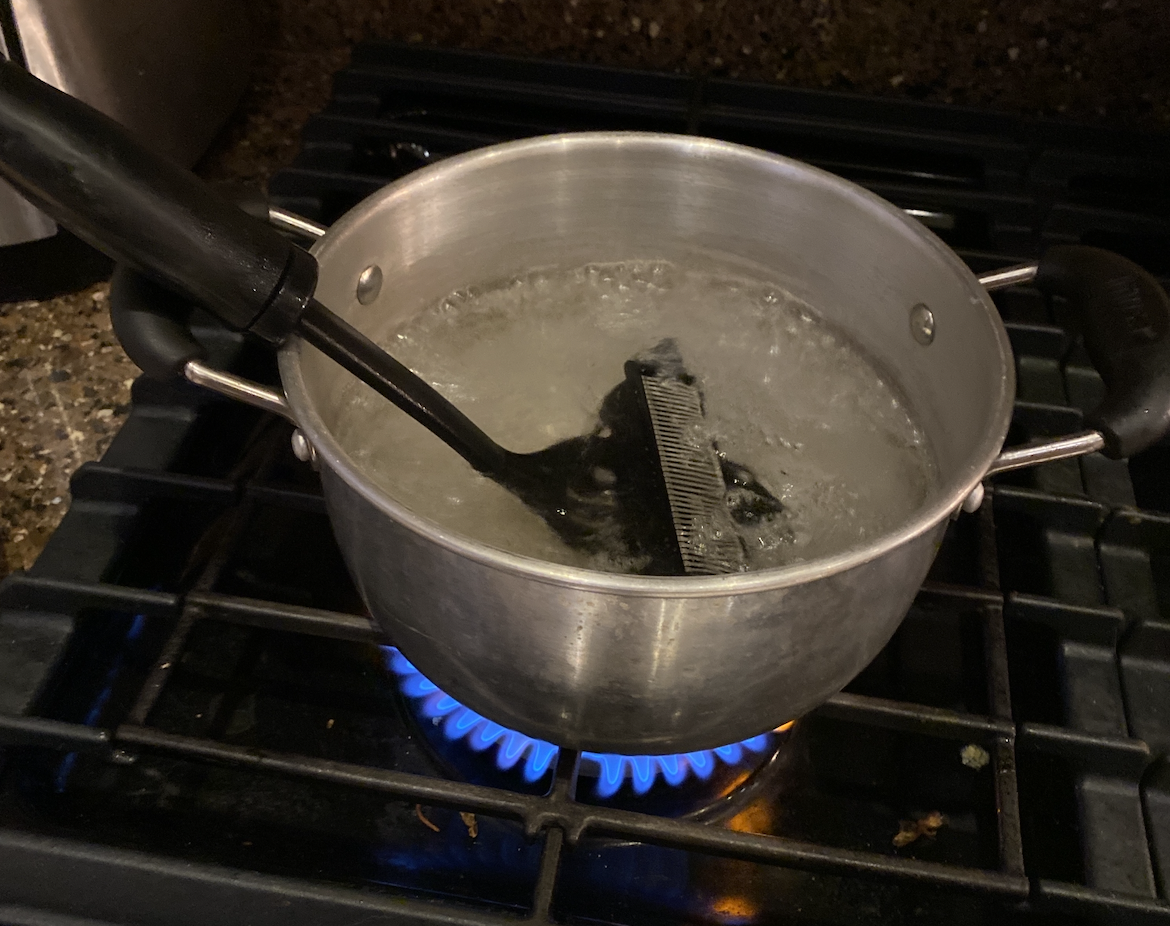
Boil the 72-pin connector.
I was extremely hesitant. But honestly, I had nothing to lose. If I ruined it, I would just buy a replacement anyway.
So I tried it.
I filled a pot with water, placed the 72-pin connector on a spoon (so it wouldn’t touch the sides of the pot), and let it boil for about 30 minutes (see Fig.5).
After that, I let it dry for 24 hours before reinstalling it in the console.
Then I powered it on.
And just like that—
It worked.
My mind was blown.
All this time, the solution had been boiling the connector.
My theory is that the heat relaxed the copper contacts back toward their original positions. If any pins had become slightly bent or compressed, the heat may have helped them spring back.
The boiling water might also have helped clean areas that were impossible to reach with a toothbrush.
Whatever the exact reason, it worked.
A couple years later, a friend started having cartridge problems with their NES.
I suggested boiling the 72-pin connector.
They were skeptical… but they tried it anyway.
And to their surprise, it fixed their NES too.
This ended up being one of the most satisfying repairs I’ve ever done.
So if you’re dealing with a stubborn NES that refuses to read cartridges, before buying replacement parts, you might want to try the weirdest fix of all:
Boil the 72-pin connector.
It might work better than you expect.
(c) 2026 Ratintosh